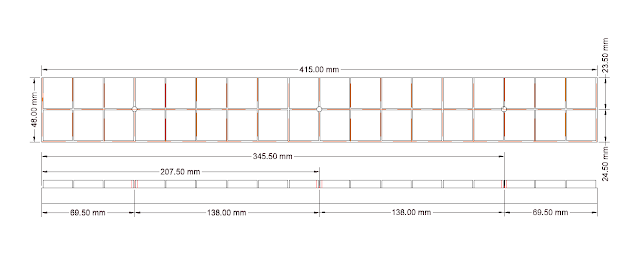
A Goban 19*19 - Part Two
the collets and drills required for the star points
Back to the board! For drilling the star points I had decided on a new process that would hopefully be more accurate than 'eye-balling' it. I set a very thin drill in the press and then ensured it could move vertically and 'locked' the scales at zero (drill presses tend to have lockable scales so you can reset back to a specific point accurately)
using the small drill bit to get accurate vertical location
I could then repeat the check horizontally. Once happy with that 'movement' I then reset the vertical axis back to zero and raised the drill press so I could replace the tiny drill bit with a larger 4mm drill bit.
and horizontal location
the 4mm drill bit is then added, visually then visually re-checked
This then allowed an accurate 4mm diameter cut to be made.
After the star points were drilled it was time to complete gluing which required an extensive amount of clamps.
Then came the surrounds. I had started favouring butt-jointing the surrounds but in the end returned to my 9*9 prototype method just because it is more secure. I also cut the angle at the edge (only 15 degrees or so) prior to gluing as post gluing the board would be borderline unmanageable.
gluing the board edge pieces
Gluing went well though there was a rise at one end that I needed to deal with using my smoothing plane which misbehaved badly (I am useless at 'setting' the things properly) so I ended up using some cabinet scrapers to tidy the wood. The key here is that my 9*9 is a little rough around the edges and I really did not want that with my main practice board.
initial gluing complete
detail of lines, note not all exact sadly
Here is where I adjusted approach from the 9*9. There the use of caulk worked but resulted in a cut up board and plane due to the concrete like caulk. This time I decided to try and use a wood strip filler. All the horizontal lines would be added 'whole' with the vertical being lots (and lots) of little lines.
So it was back to the table saw. The depth of the lines was slightly less than the gaps I had cut mainly because I wanted some room for motion. This may have been a slight mistake. Anyway I set the fence close to the blade and cut a test strip.
preparing the table saw to cut the american black walnut 'lines'
then used the micrometer stop to adjust marginally to the size I wanted. Since the lines are not guaranteed to be exactly the same size I did want slightly different strips widths to ensure a decent fit.
the micrometer stop was very useful here to allow a more precise adjustment post first cut
Once I had my strips I then fit all the horizontal lines with the best size match over the entire board with the exception of the star lines.
The shot below gives a good idea of the dummy fitting of the lines to test length and fit prior to gluing.
preparing the long 'lines' for insertion
Once satisfied with the lines it was time to glue which was a simple matter of spreading the glue and then pushing in.
glue added across the long 'lines'
Star Points
The star points needed slightly less than 4mm wide dowels of the same wood type as the strips. So for this I cut some small 4.5mm*4.5mm blanks on the table saw.
these are the blanks for the start points
And then seized them to my lathe.
in the lathe ready for turning
once the turning is complete
I could then test the fit by pushing it into the star points prior to marking the height and cutting.
checking the fit is good
Then gluing and placing.
post measurement and fitting
The next, long, step was the vertical pieces which needed measuring against the board, marking, cutting with a chisel and mallet, sizing then gluing and placing. A long operation but not complicated. My thicknesser proved useful here with the odd thinning of any of the thicker strips. Most of them went in fine but I quickly found the two exceptions were pieces that were slightly too 'fat' which required pushing - not so bad as I could sand off the 'top' once the glue had dried and the more problematic slightly too thin pieces which sometimes had a tendency to go too deep. This only affected five-six lines and was the reason why making the depth of the line wood match more closely the cut size became something I considered later on.
Once all the lines were in I then had to slightly sand (I also used a chisel where any of the lines extended 'aggressively' over the board) prior to coating with Danish Oil. This brings out the natural color making the beech a nicer tan/yellow colour and at the same time makes the American Black Walnut much darker.
after the third coat of Danish oil has been added
All done
Here it is with some pieces on to give an idea of the colour combinations and size when used with Chinese measurement stones.


Great work, I love the inlaid dark wood for the lines and star points! I’ve always envied people who have such skills to create beautiful things from wood.
ReplyDelete(But TBH, my OCD also makes me cringe at the irregularity of how the outer corners are joined :-D )